In this rich guide we will walk you through a step-by-step process to installing Red Hat Enterprise Linux (RHEL) 7.9 on VMware Workstation Pro. #
Prerequisites: #
VMware Workstation #
- You can download VMware Workstation from the here:
Red Hat 7.9 ISO #
- You can download the ISO from Red Hat Offical Website here.
Host System Requirements #
- Minimum 8 GB of RAM.
- A Dual Core Processor.
- 128 GB+ of Hard Drive Storage
Step 1 #
Create a Virtual Machine #
-
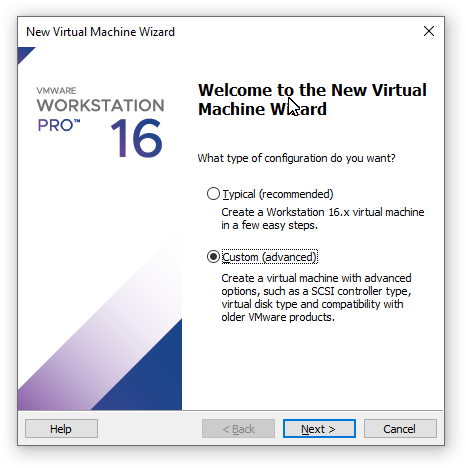
Open VMware Workstation and Click on File and select New Virtual Machine, Select Custom (advanced) option and click Next.
-
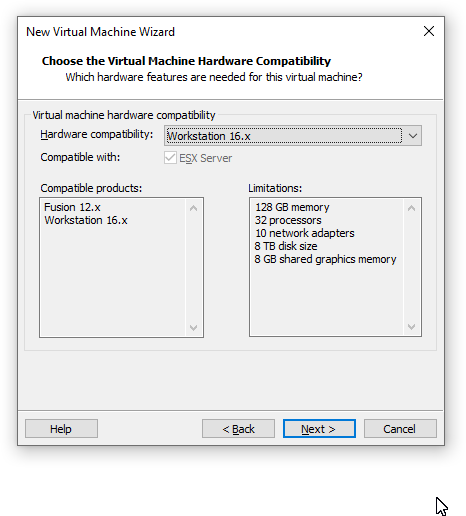
Keep the Default Hardware Compatibility Workstation 16.x and click Next
-
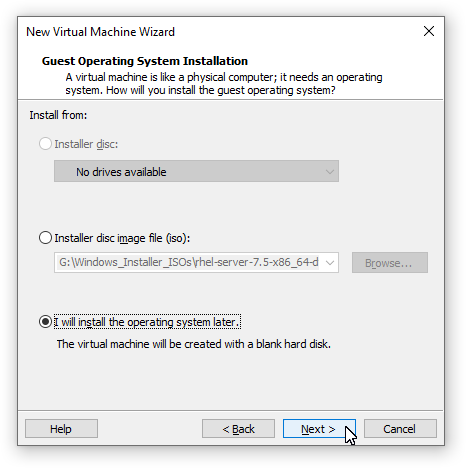
Select I will install the operating system later. as we will be mounting the ISO seperately once the Virtual Machine has been created.
-
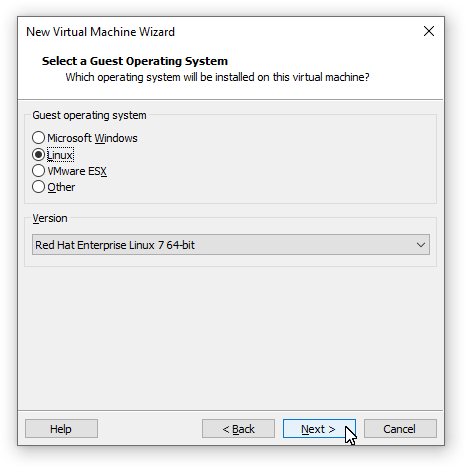
Select Linux as the Guest Operating System and Version Red Hat Enterprise Linux 7 64-bit.
-
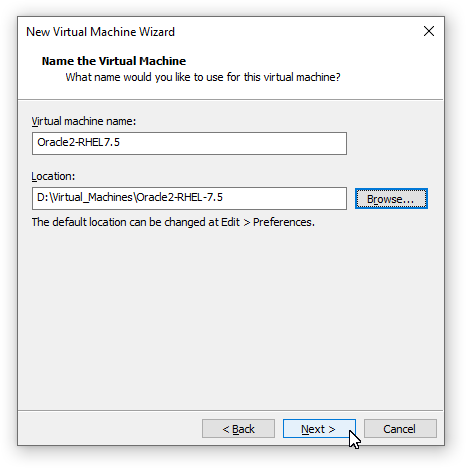
Give your Virtual Machine a Name and a Location.
-
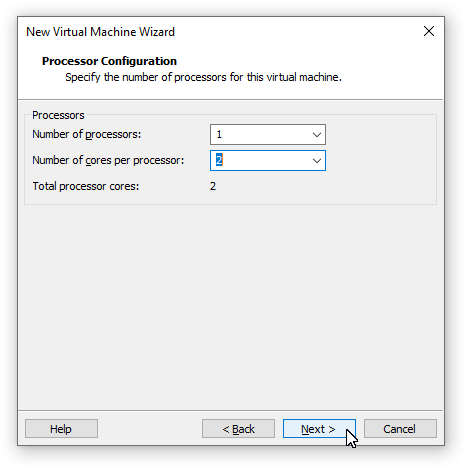
Select the Number of Available Cores per processor depending on your Host systems availability. In this case we have selected 02 Cores.
-
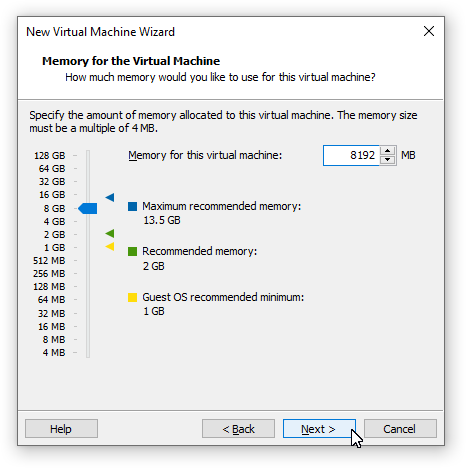
Specify the Amount of RAM as per your requirement. In this Case we had 16 GB of Avilable Memory on host, Hence we have selected 8 GB.
-
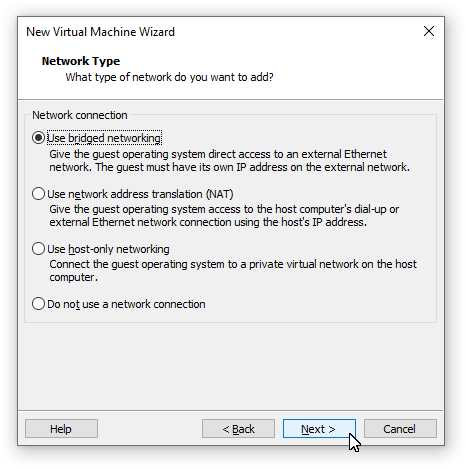
Select Use bridged networking as we will be using the external LAN for our Networking.
-
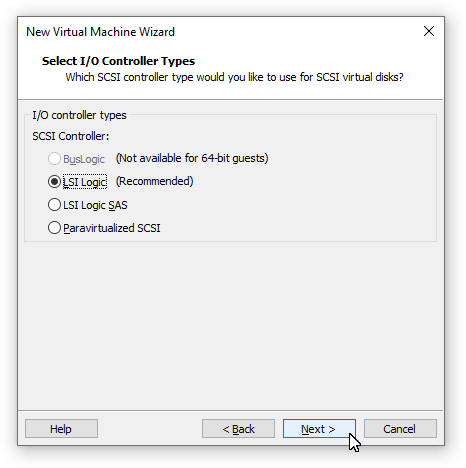
Keep the default selection LSI Logic.
-
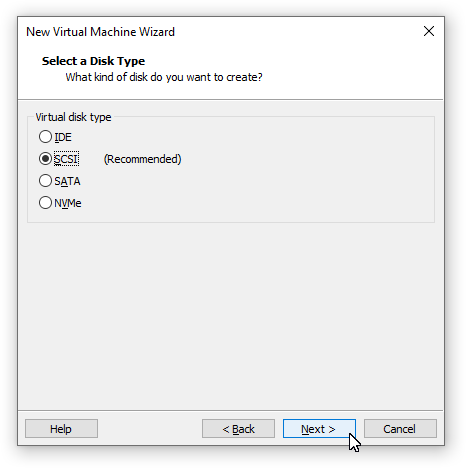
Keep the default selection for virtual disk type SCSI.
-
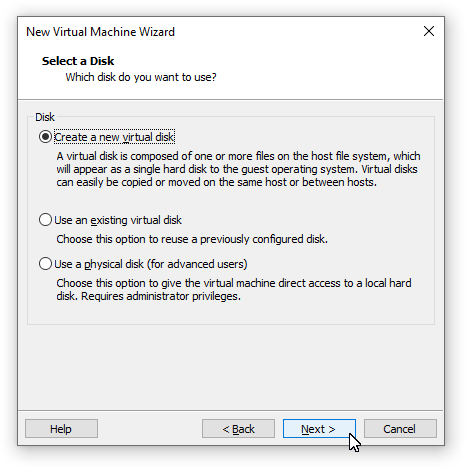
Selelct Create a new virtal disk.
-
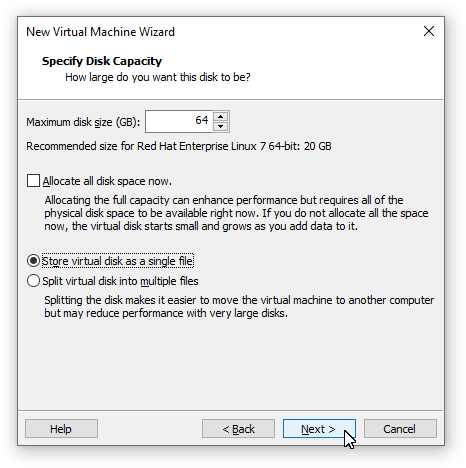
Allocate a disk size of 64 GB and select Store virtual disk as a single file and complete the wizard.
-
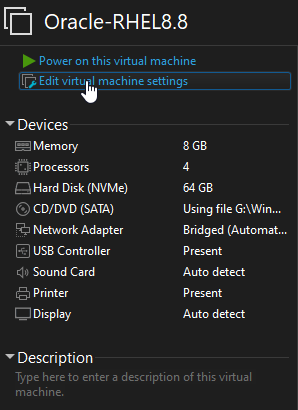
Once the Virtual machine has been created, Edit the virtual machine settings
-
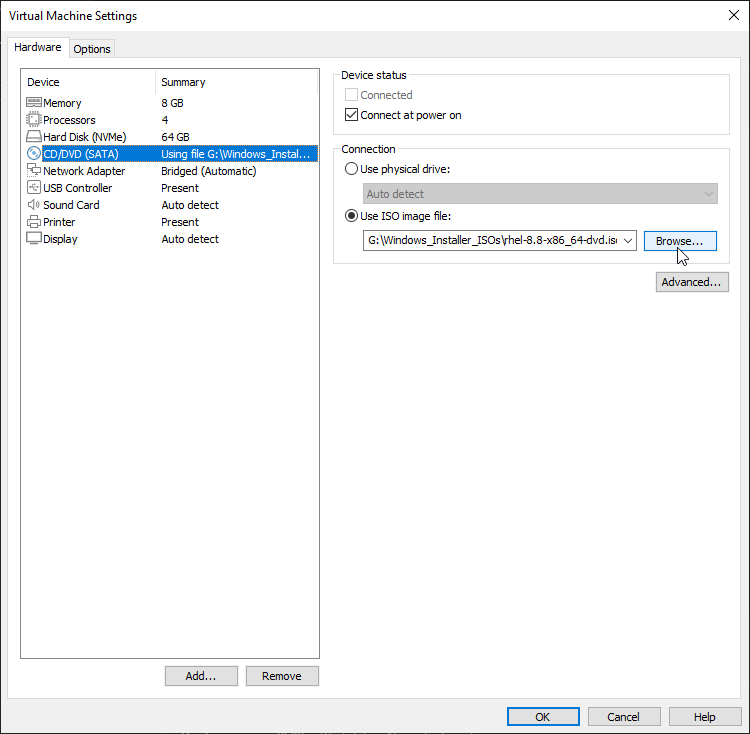
Under the Hardware tab, select the Virtual Disk Drive and locate the RHEL ISO for the Installation.
-
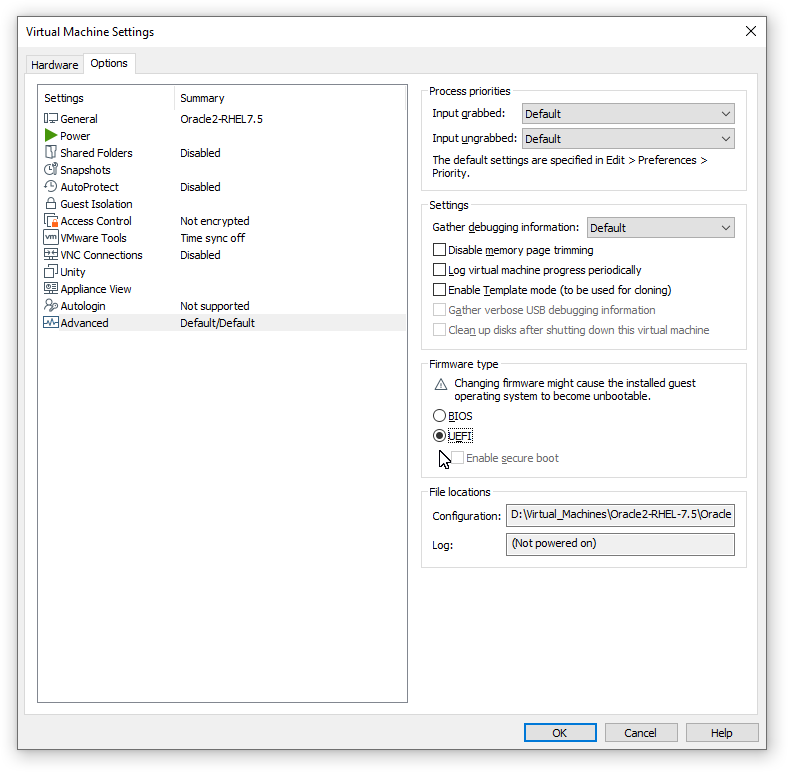
Under the Options tab, select the Advance and under Firware Type select UEFI and click ok.
-
Now Power on the Virtual Machine
Step 2 #
Install RHEL 7.9 #
-
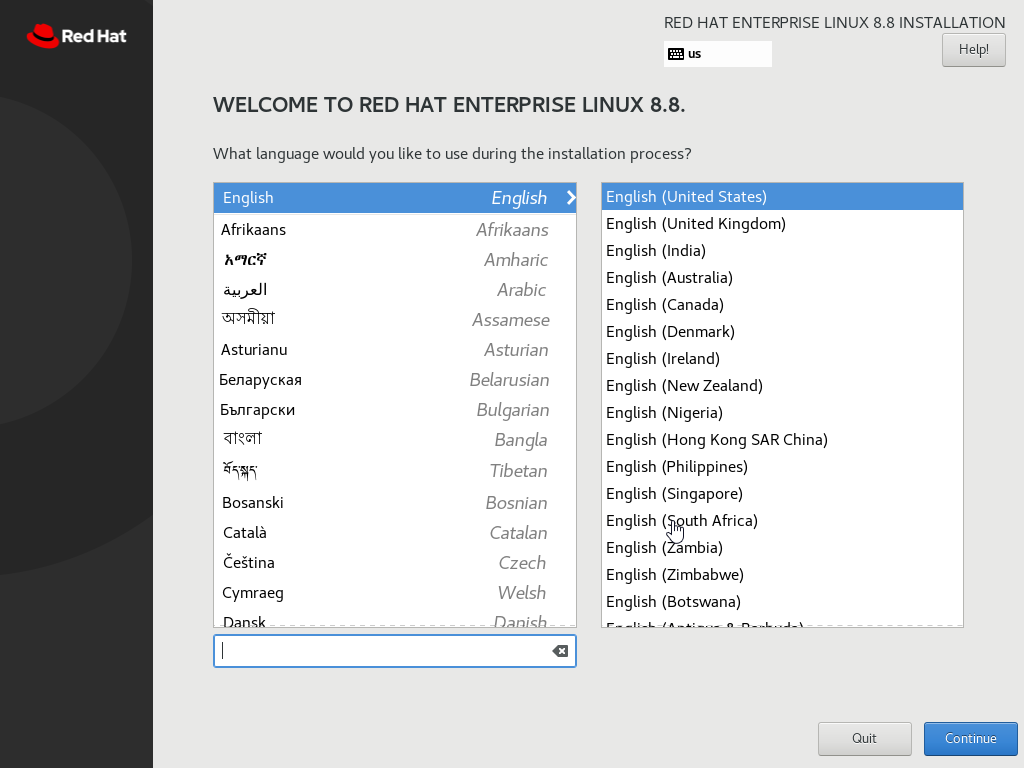
Select English as the Language and click on Continue.
-
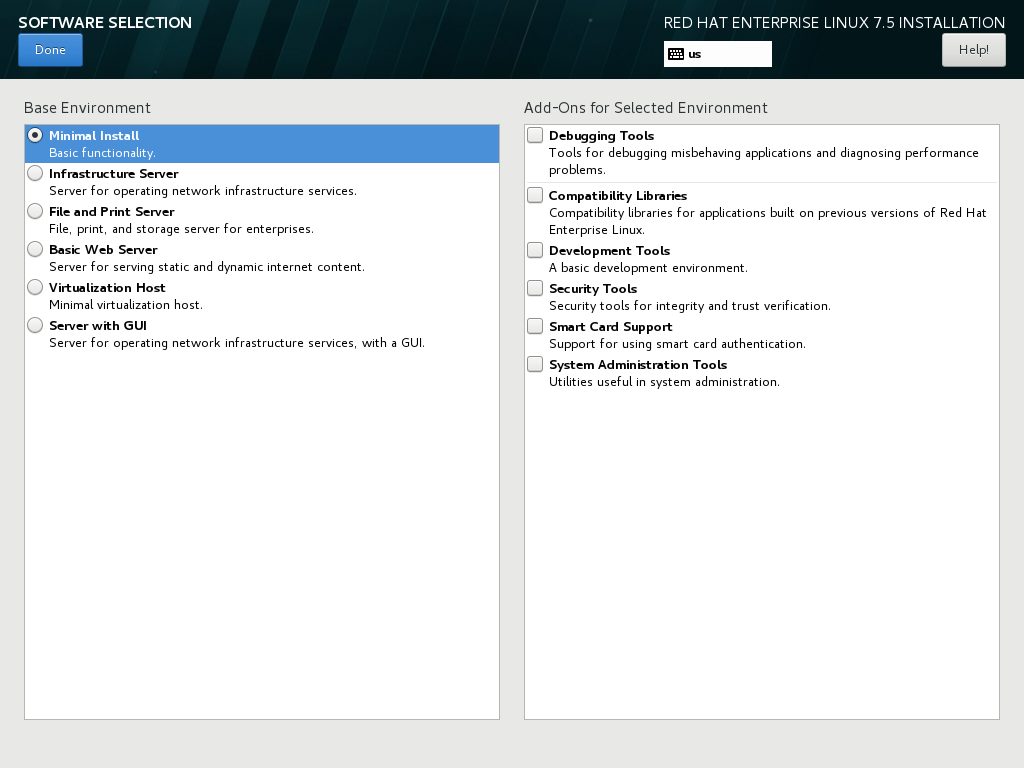
Select Software Selection and under Base Environment select Minimal Install.
-
Select Installation Destinaion and under System select I will configure the partitioning, Click Done. Select Standard partitioning and create the partitions as follows:
Click Done and Accept Changes.System Size /boot/efi 512 MiB /swap 8192 MiB (8GB) / Remaning space available 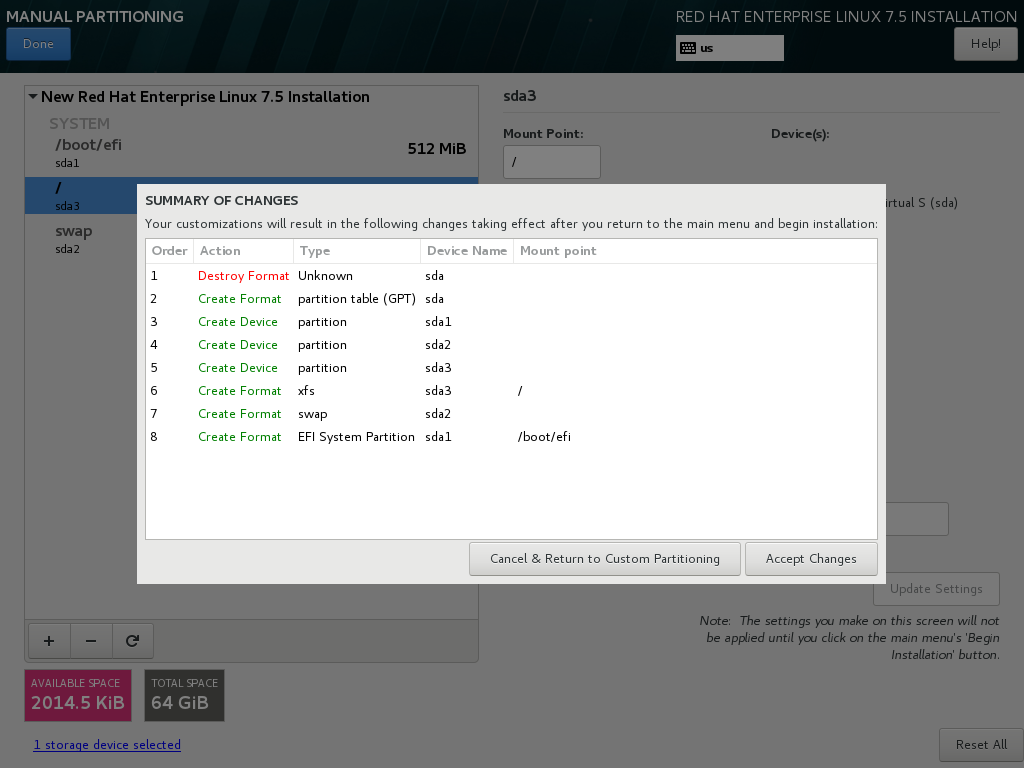
-
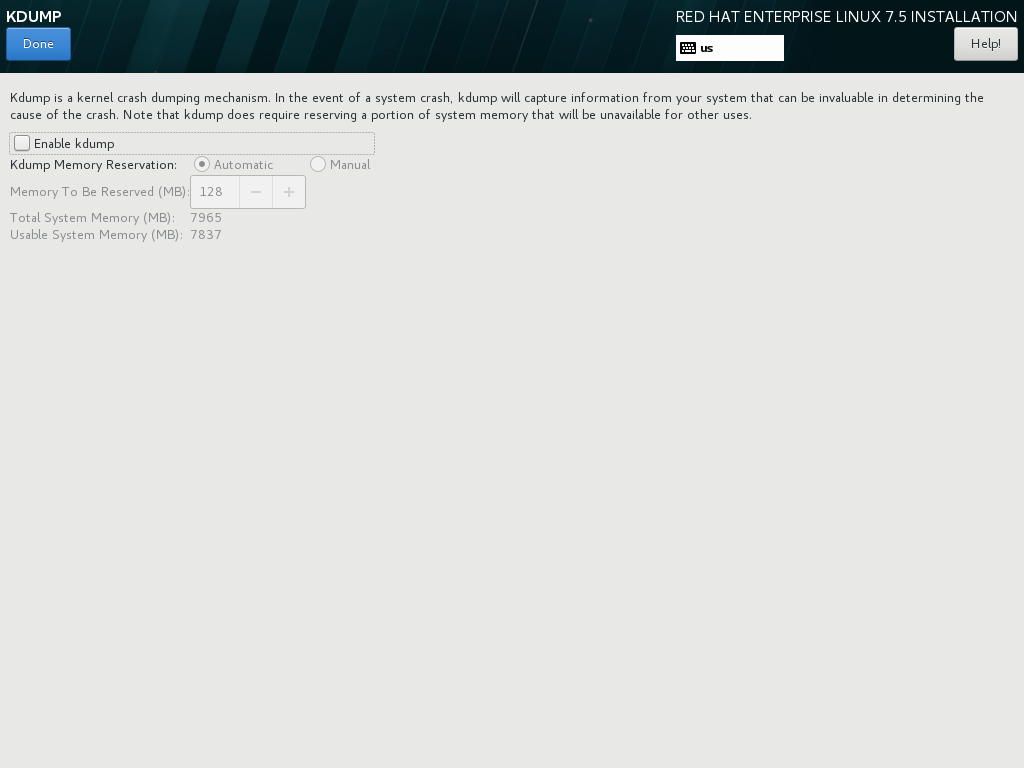
Select KDUMP, uncheck the enable KDUMP option and click Done.
-
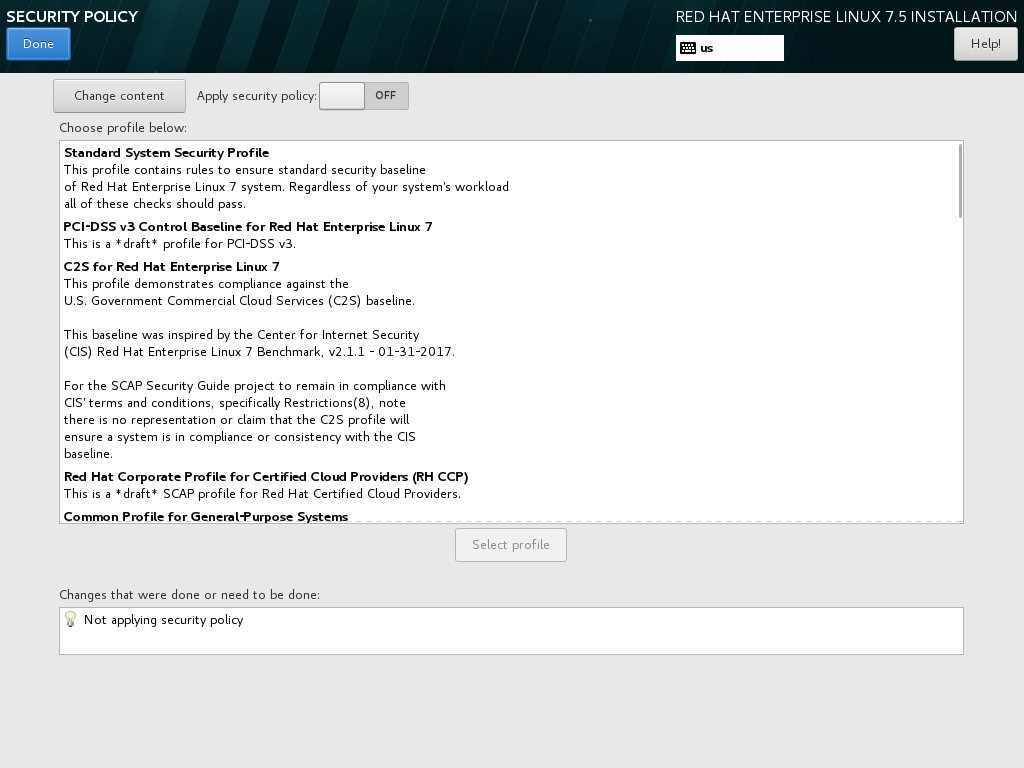
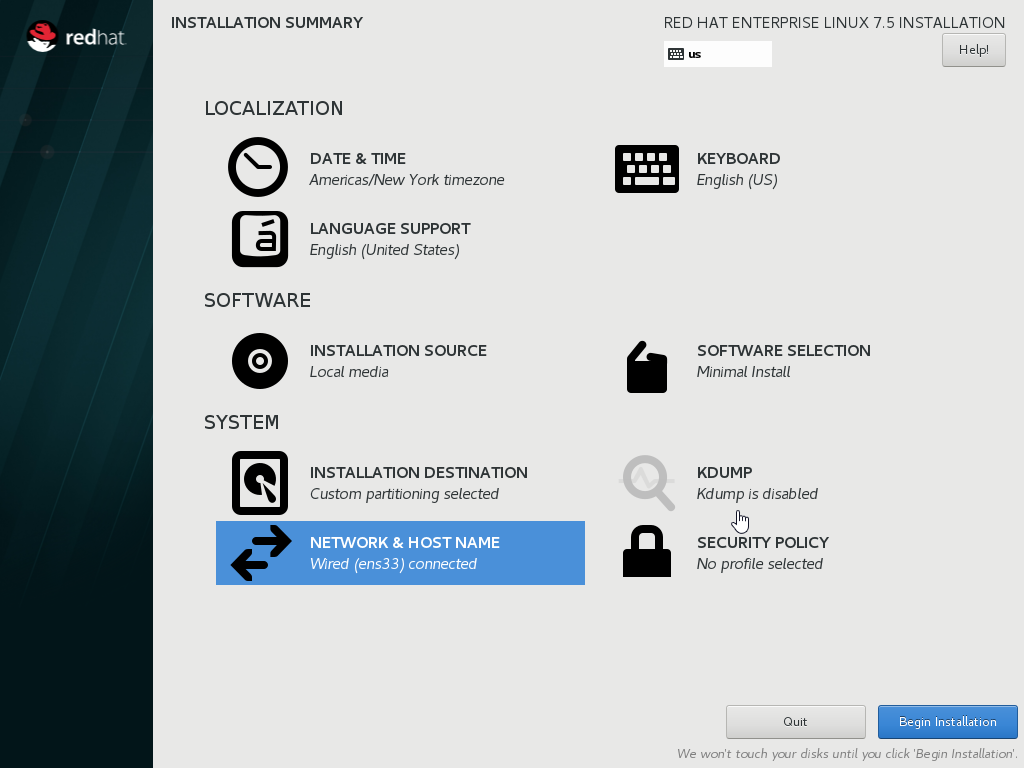
Select Security Policy, uncheck the Apply security policy option and click Done.
-
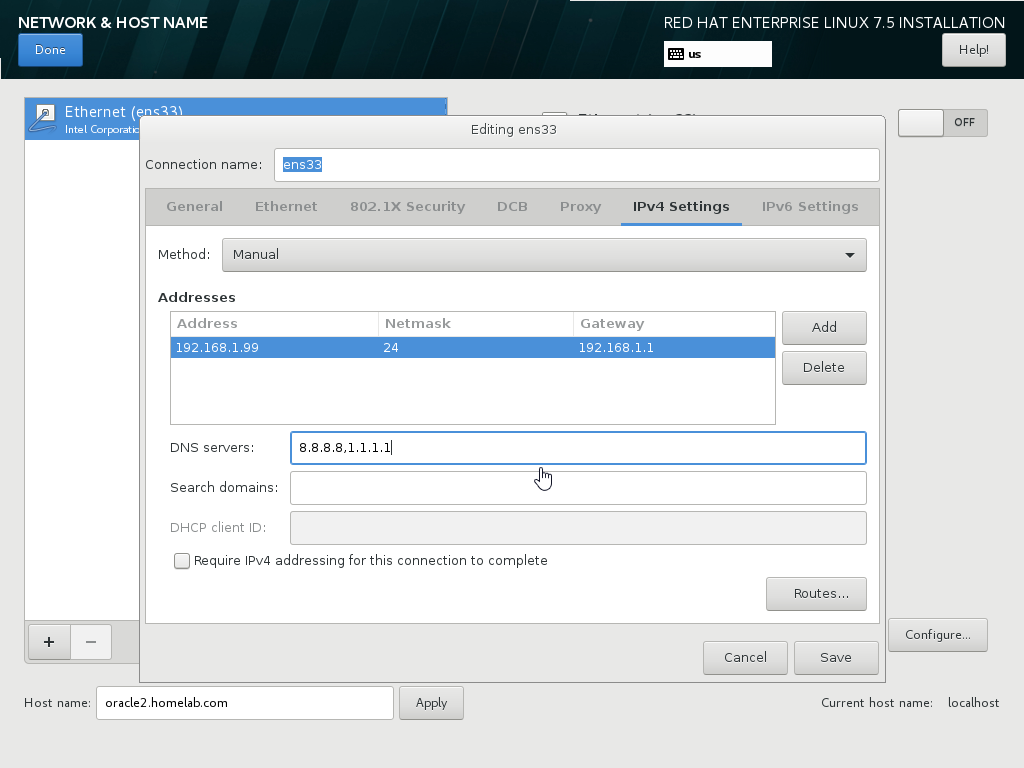
Select Network & Hostname. Add a Hostname and Click Apply. Click on Configure, select the IPv4 Settings, Change the Method to Manual and assign a Static IP address which is available in your LAN Subnet. Add DNS 8.8.8.8,1.1.1.1 in the DNS Servers Field.
-
Click Begin Installation.
-
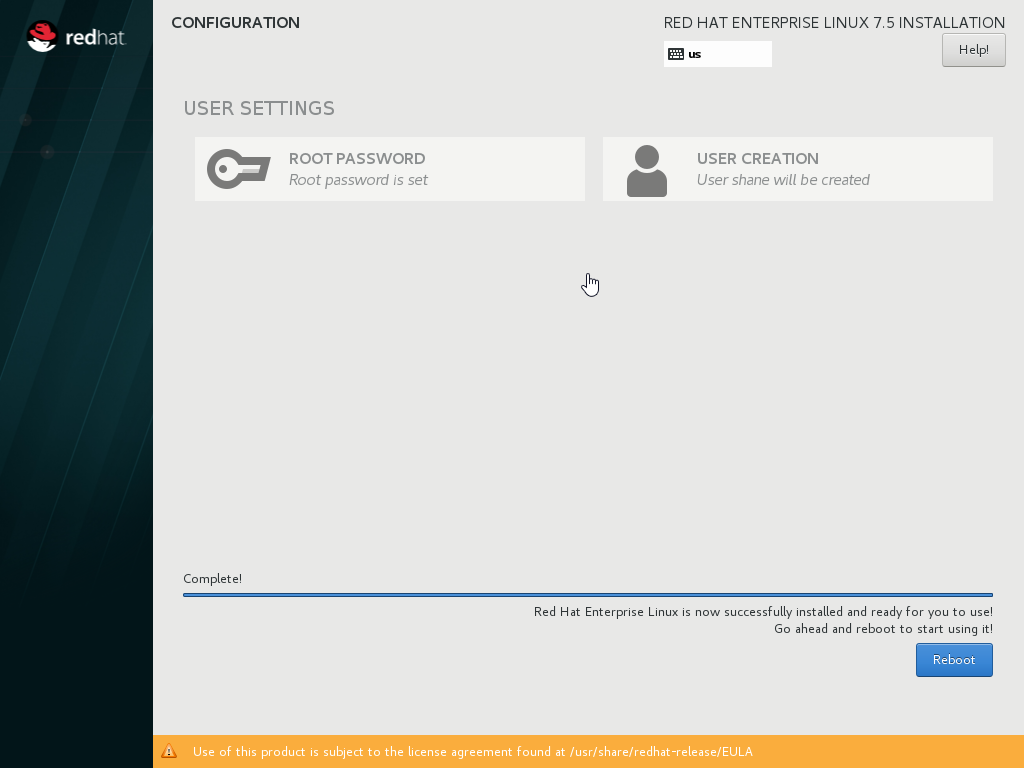
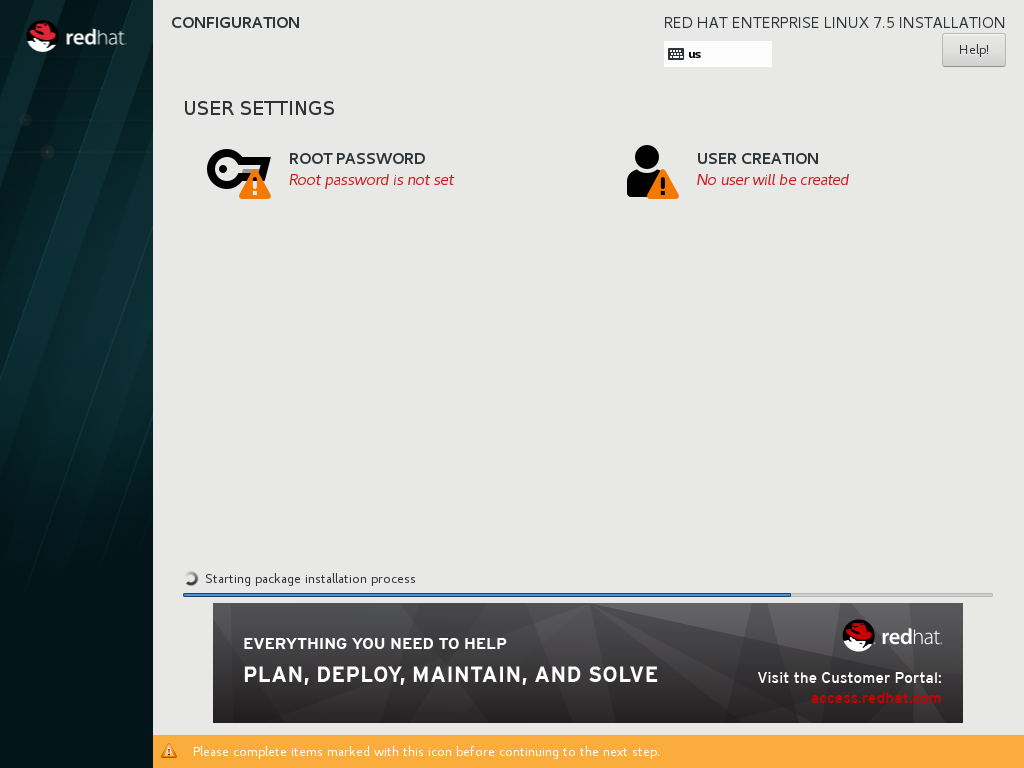
Set a Root Password and Create a User .
-
Once the Installation has been Completed, Click Reebot.