A step-by-step process to installing Oracle 19c Software for Single Instance Database on Red Hat Enterprise Linux 7.9 #
Prerequisites #
Install required X11 packages #
Install X11 packages with following command based on your operating system release and version:
yum install xorg-x11-xauth -y
Configure X11 forwarding #
To enable X11 Forwarding, change the “X11Forwarding” parameter using vi or nano editor to yes in the /etc/ssh/sshd_config file if either commented out or set to no.
vi /etc/ssh/sshd_config
or
nano /etc/ssh/sshd_config
You should see similar output as the following:
X11Forwarding yes
Install the Dependencies #
🛠️Install the Following🛠️
yum install libnsl* -y
yum install -y bc
yum install -y binutils
yum install -y compat-libcap1
yum install -y compat-libstdc++-33
#yum install -y dtrace-modules
#yum install -y dtrace-modules-headers
#yum install -y dtrace-modules-provider-headers
yum install -y dtrace-utils
yum install -y elfutils-libelf
yum install -y elfutils-libelf-devel
yum install -y fontconfig-devel
yum install -y glibc
yum install -y glibc-devel
yum install -y ksh
yum install -y libaio
yum install -y libaio-devel
yum install -y libdtrace-ctf-devel
yum install -y libXrender
yum install -y libXrender-devel
yum install -y libX11
yum install -y libXau
yum install -y libXi
yum install -y libXtst
yum install -y libgcc
yum install -y librdmacm-devel
yum install -y libstdc++
yum install -y libstdc++-devel
yum install -y libxcb
yum install -y make
yum install -y net-tools # Clusterware
yum install -y nfs-utils # ACFS
yum install -y python # ACFS
yum install -y python-configshell # ACFS
yum install -y python-rtslib # ACFS
yum install -y python-six # ACFS
yum install -y targetcli # ACFS
yum install -y smartmontools
yum install -y sysstat
yum update -y
yum grouplist
yum group install "Development Tools"
Create Oracle Groups and add user #
groupadd -g 3001 oinstall
groupadd -g 3002 dba
groupadd -g 3003 oper
useradd -u 3001 -g oinstall -G dba,oper oracle
passwd oracle
Create the required directories #
mkdir -p /u01/app/oracle/product/19.3/db_home
Change Ownership & Access Permissions #
chown -R oracle:oinstall /u01
chmod -R 775 /u01
su - oracle
export CV_ASSUME_DISTID=RHEL8.5
Update the .bash_profile #
vi .bash_profile
nano .bash_profile
Update the Bash Profile with the following:
export ORACLE_BASE=/u01/app/oracle
export ORACLE_HOME=/u01/app/oracle/product/19.3/db_home
export CLIENT_HOME=/u01/app/oracle/product/19.3/client
#export ORACLE_SID=CDB
export LD_LIBRARY_PATH=\$ORACLE_HOME/lib:$CLIENT_HOME/lib:/lib:/usr/lib
export CLASSPATH=\$ORACLE_HOME/jlib:\$ORACLE_HOME/rdbms/jlib:$CLIENT_HOME/rdbms/jlib$
export NLS_LANG=american_america.al32utf8
export NLS_DATE_FORMAT="yyyy-mm-dd:hh24:mi:ss"
export PATH=$PATH:$HOME/.local/bin:$ORACLE_HOME/bin:$CLIENT_HOME/bin
19c Installation #
Download the Oracle 19c Software from Oracle’s Offical Website Copy it to $ORACLE_HOME location, unzip the software and run below cmd
./runInstaller
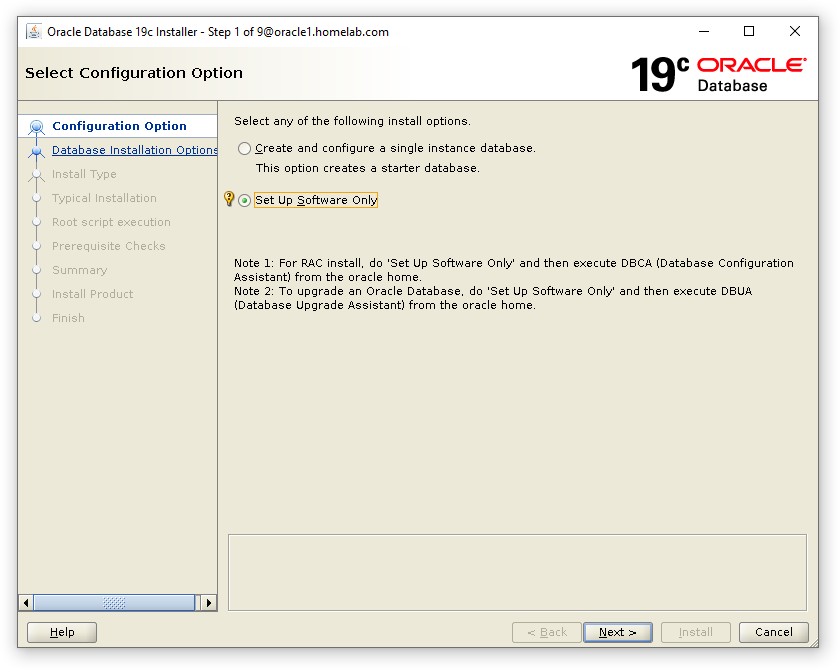
Oracle 19c DB Software Installation Wizard will appear. #
-
Select Setup Software Only.
-
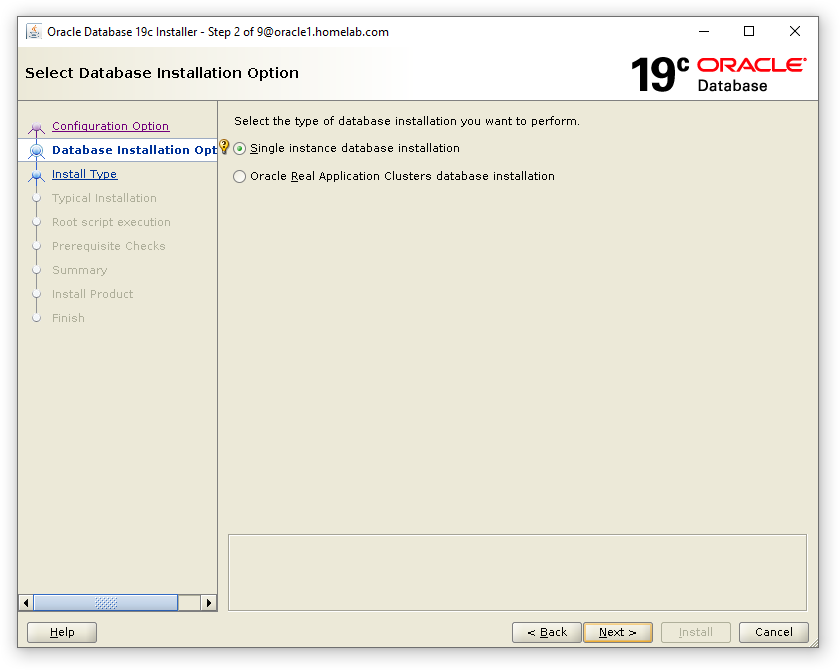
Select Single Instance Database Installation.
-
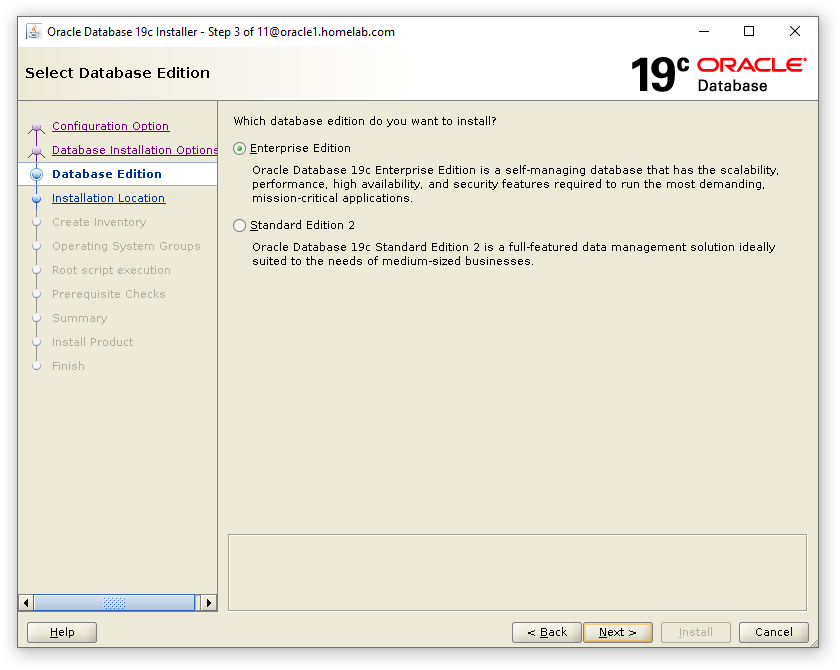
Select Enterprise Edition.
-
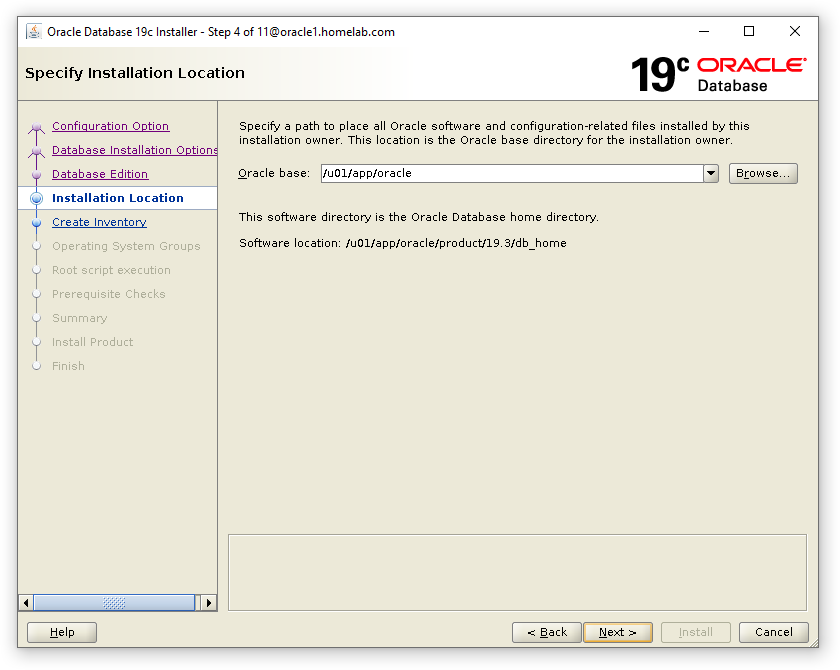
Verify Oracle Base Location and Proceed to the Next Step
-
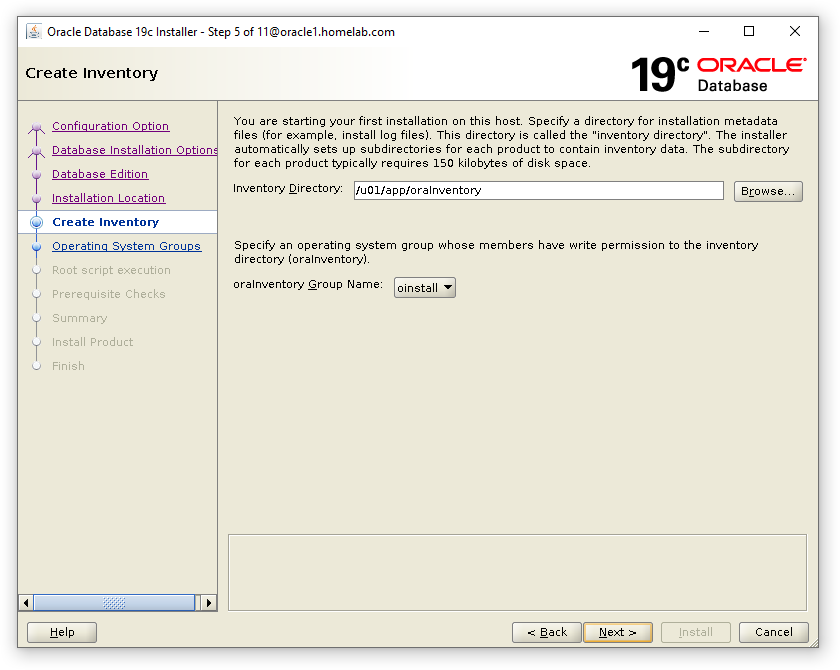
Verify Oracle Inventory Location and Proceed to the Next Step
-
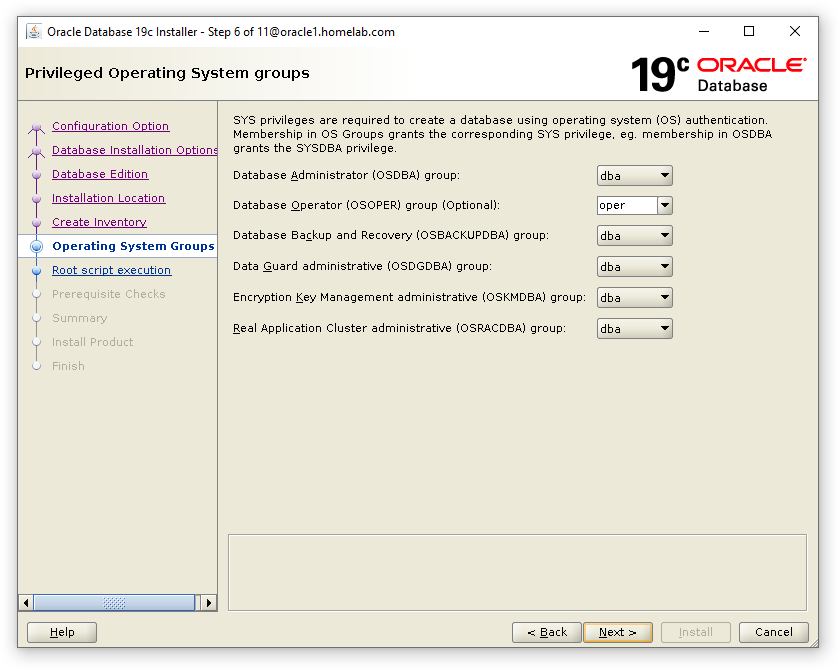
Verify the OS Groups created in the Prerequisite Step above.
-
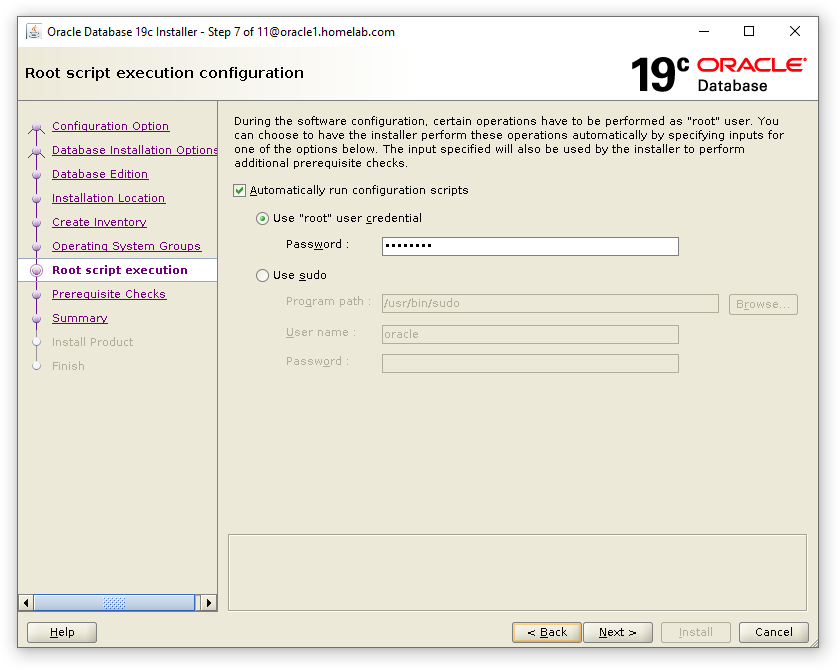
Select the Automatically run Configuration Scrips and Select use root and enter the root Password Below.
-
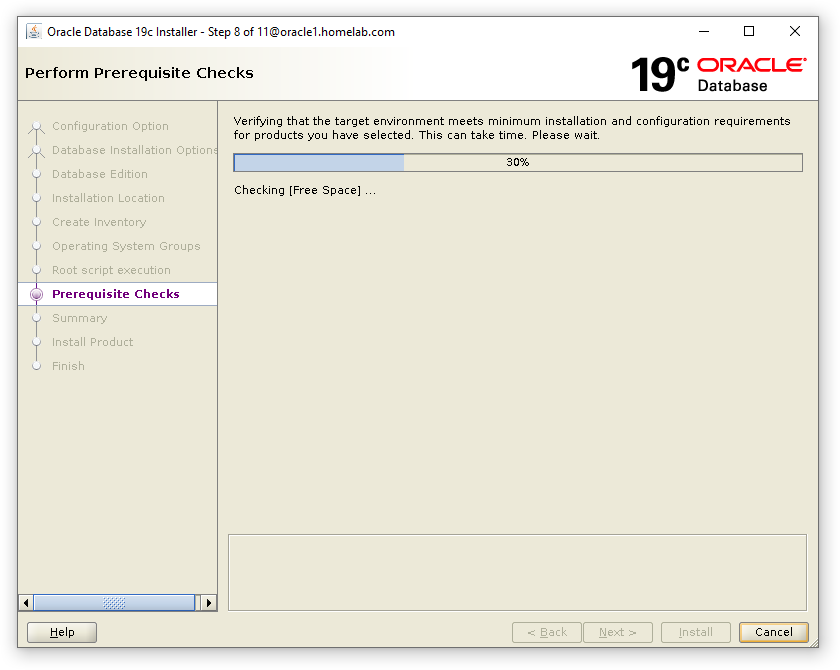
The Installer will perform the Prerequisite Checks before proceeding. Save the Response File once the Checks have been completed for future reference.

-
Installation of Oracle 19c Software will begin.
Once the Installation has Completed, Execute the following command to verify the sqlplus version. #
sqlplus -v
You will get the Following Output: #
